Zone focusing is one of the most powerful tools for street photographers looking for the “decisive moment”. It’s easy to do with true manual focus lenses but a bit of a challenge with an AF camera like the X100V. My 8 minute workshop will get you through the tricky parts! Hit the jump for the video workshop!
Learn X100V Zone Focus In 8 Minutes!
Street photography is all about timing.
That could mean being in a specific location when something interesting is actually happening. But timing also involves being ready to capture the “decisive moment” as it happens. And the last thing you need is to be fiddling with focus as the best shot of your life passes you by.
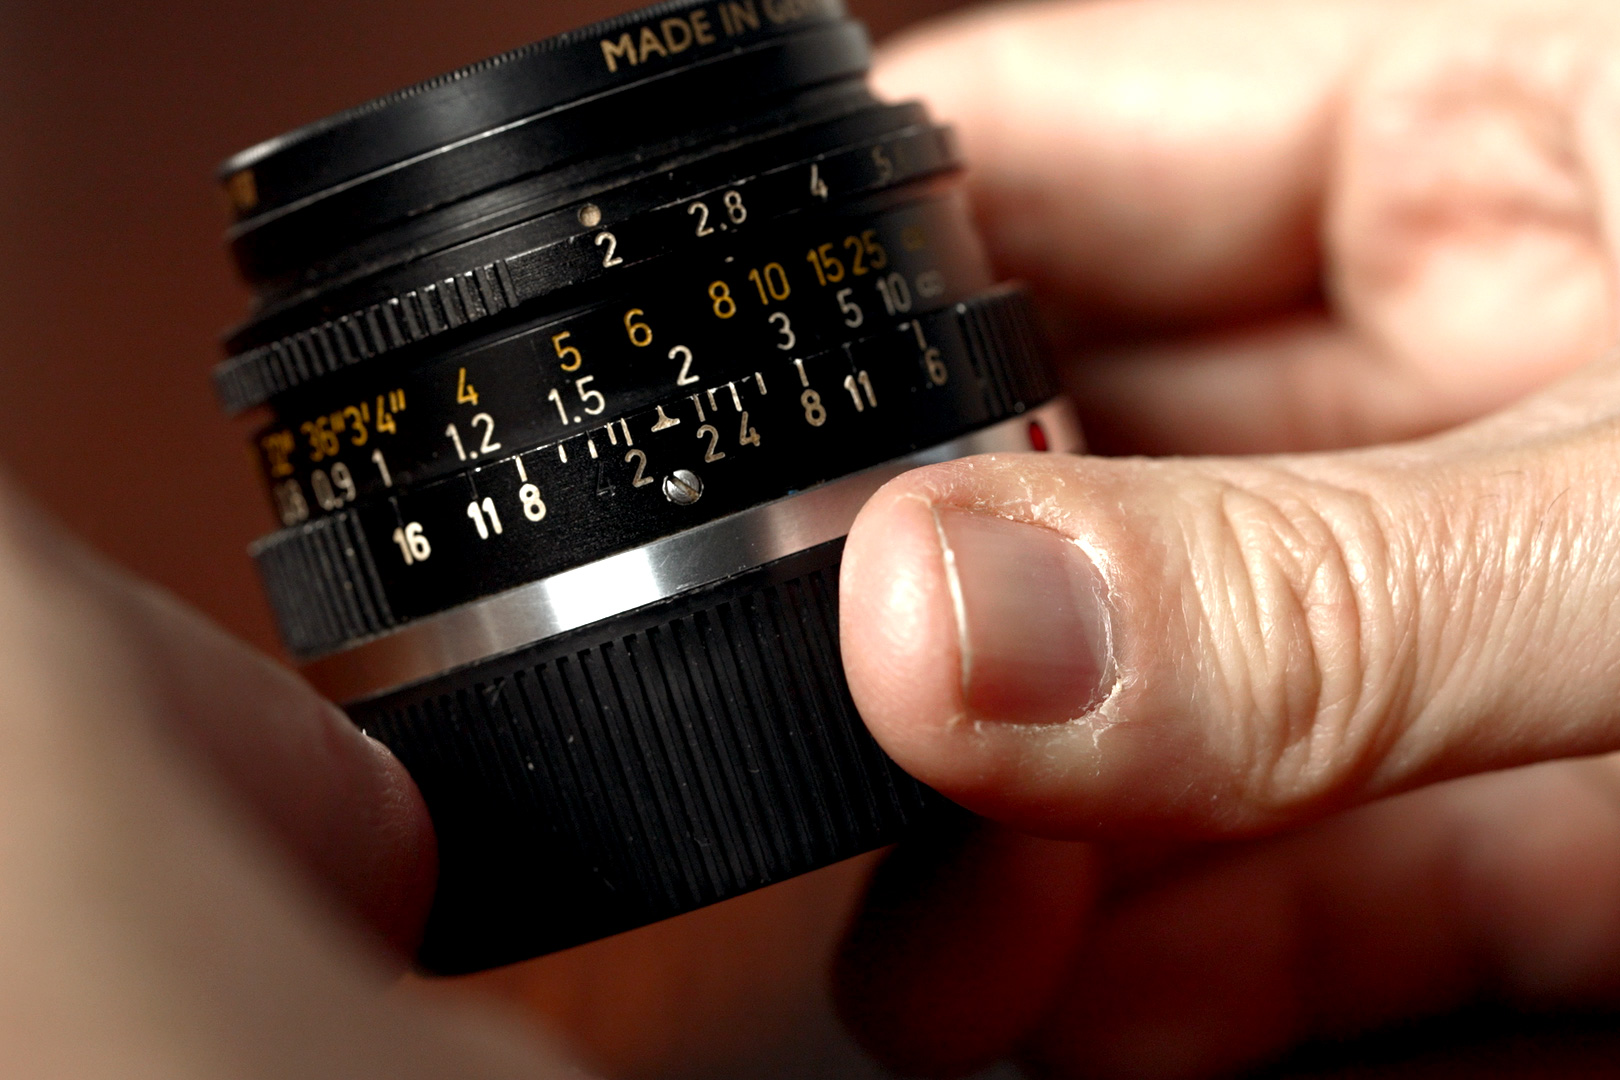
So a lot of street shooters take a cue from the olden days and pre-focus their lens to make sure as much of the scene as possible is in focus. It’s called ZONE FOCUSING and it’s super easy to do if you’re using a manual focus lens but a bit of a pain with an auto focus camera like the Fuji X100V.
As it turns out… I’ve been zone focusing with each of my X100’s over the years and I have a few tips I can share…
So let’s get into it!
What Exactly Is Zone Focus Anyway?
I think a lot of people misunderstand the idea of zone focus and think that they’re supposed to blindly pre-focus their lens based on how far away they “think” their subject is.
But instead of guessing distance, the idea is to use depth of field to create a range or “zone” of focus that includes your subject. It’s like you’re casting a big net to catch a little fish.
The good news is that you really only need to worry about 2 zones when you’re shooting on the street. And that makes the whole thing super easy.
But before we get into all that, let’s talk about depth of field and hyperfocal distance.
Depth Of Field And Hyperfocal Distance
This is the nerdy part of the program so bear with me.
Depth of field is the range of distance within your frame that appears to be in focus and this is controlled largely by aperture. The smaller your aperture the larger your depth of field. But depth of field is also affected by focus distance.
Let’s say you’re shooting at f8 at a given focus point and this creates a certain amount of depth of field. This “in focus” zone slides forward and back with your focus point and depth of field expands the farther away you focus. But if you focus too far your depth of field extends past infinity and gets wasted on an area that’s already in focus.
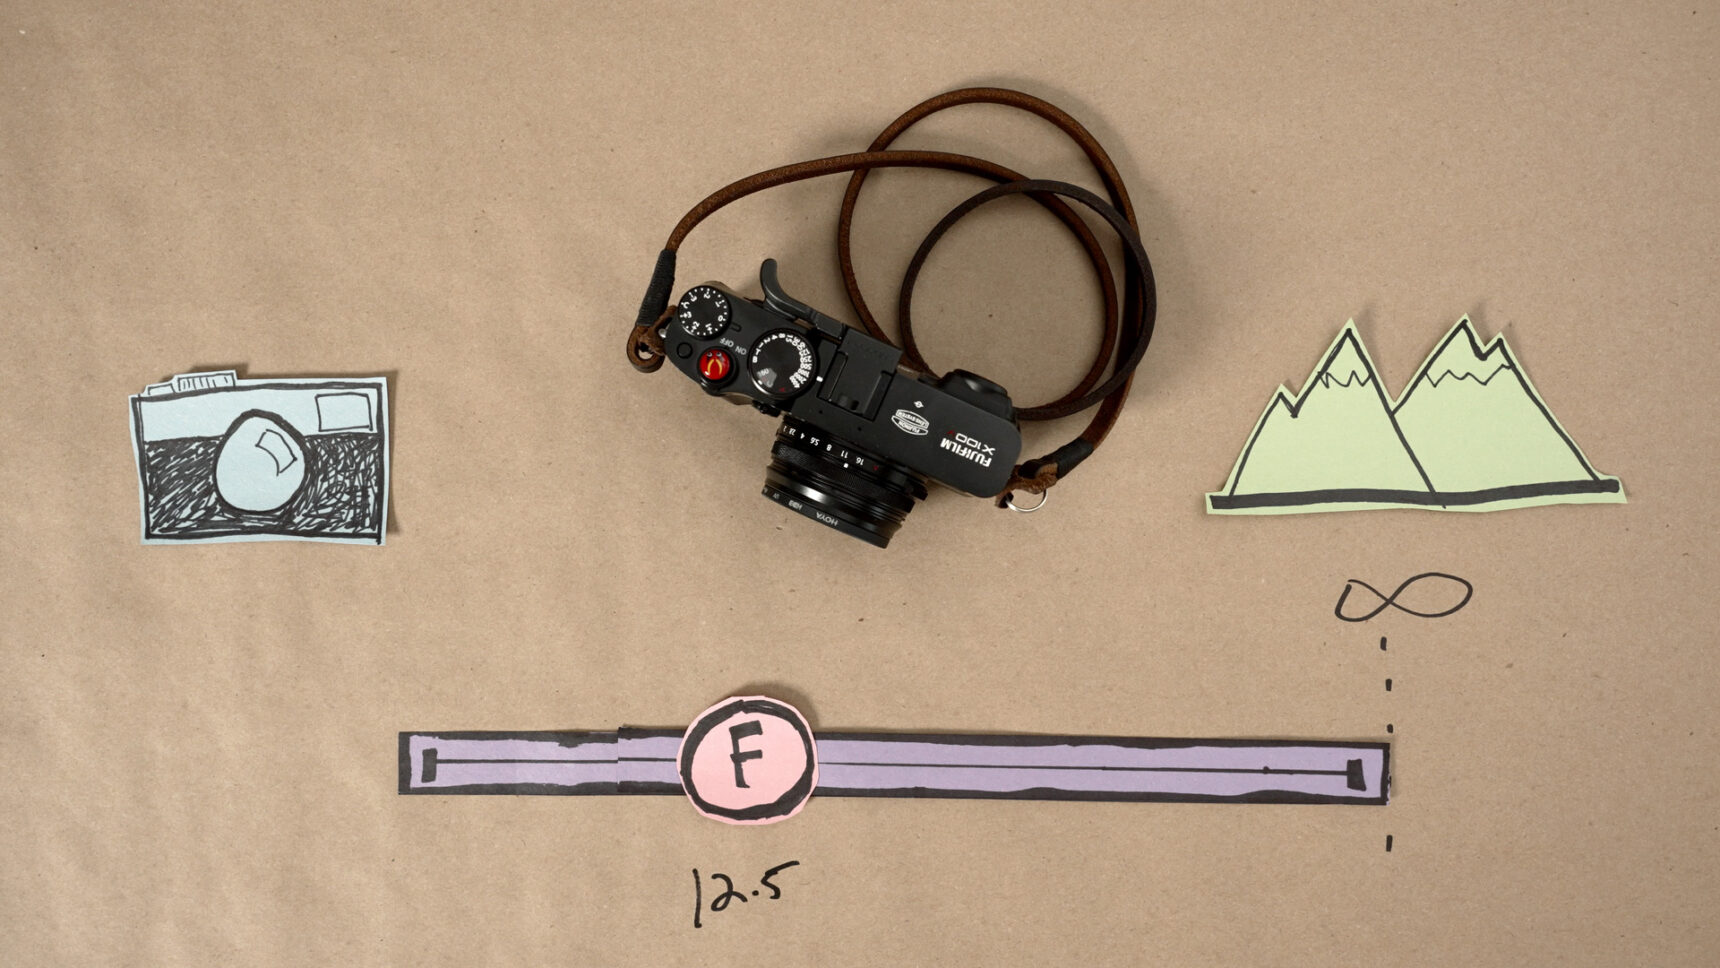
The trick here is to BALANCE your aperture and focus point so that the farthest end of the depth of field is just “kissing” infinity. This is your hyperfocal distance and it produces the maximum range of focus for your aperture.
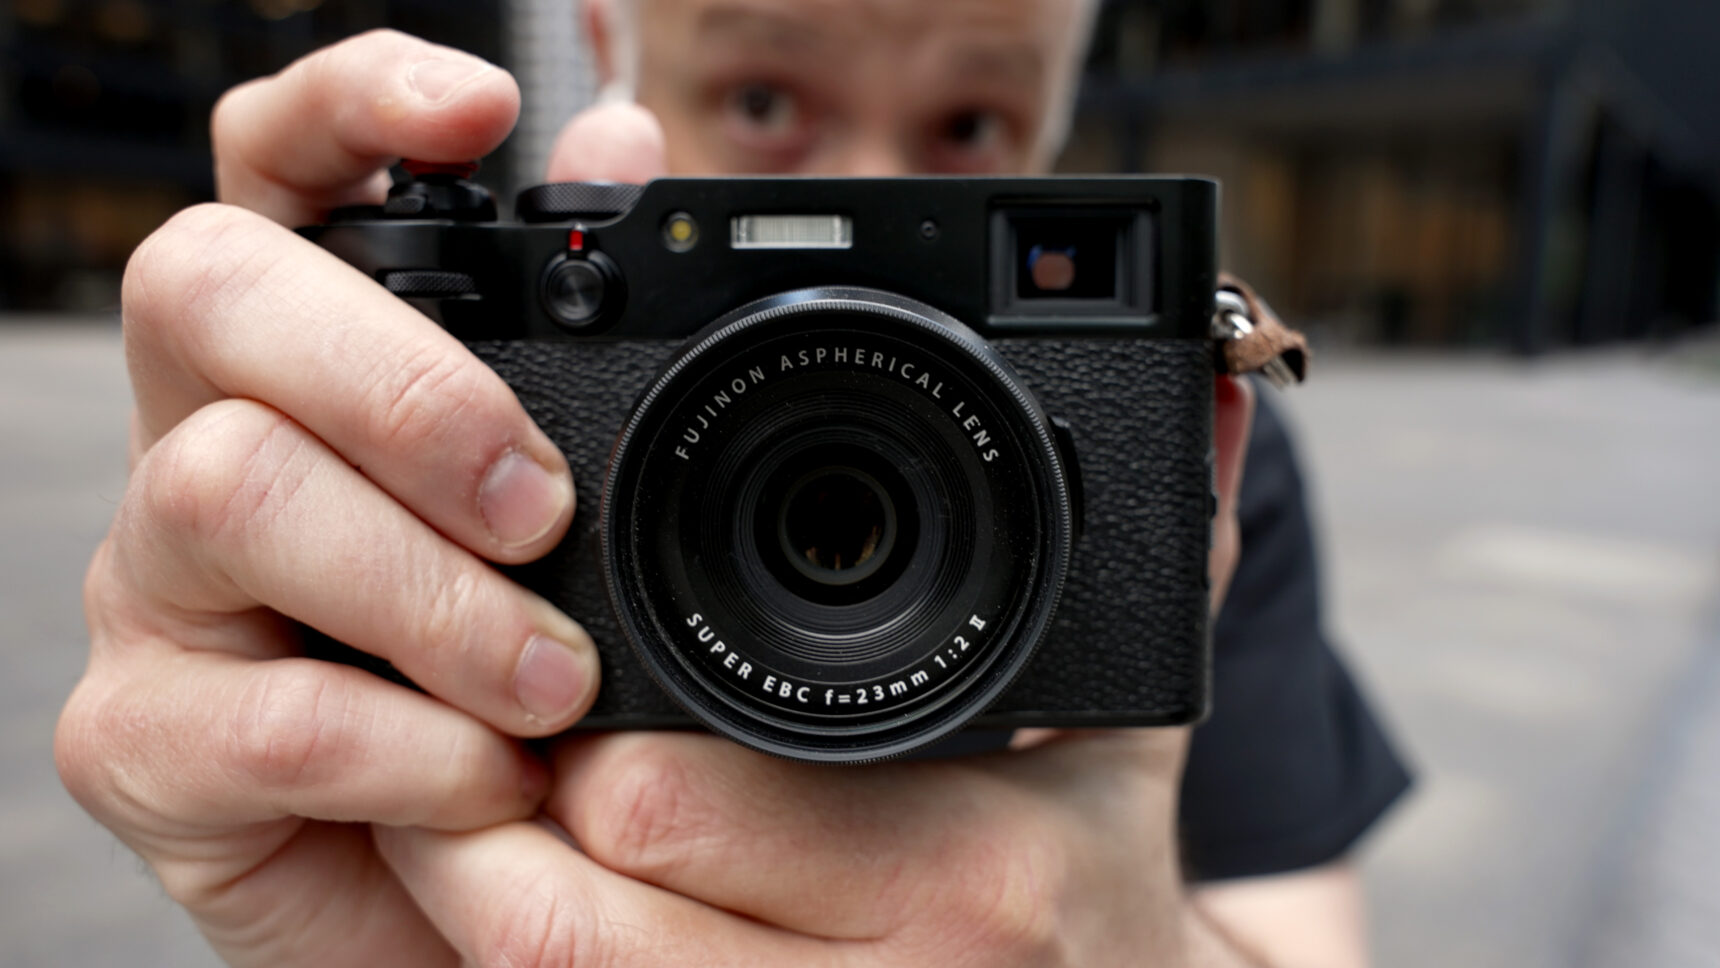
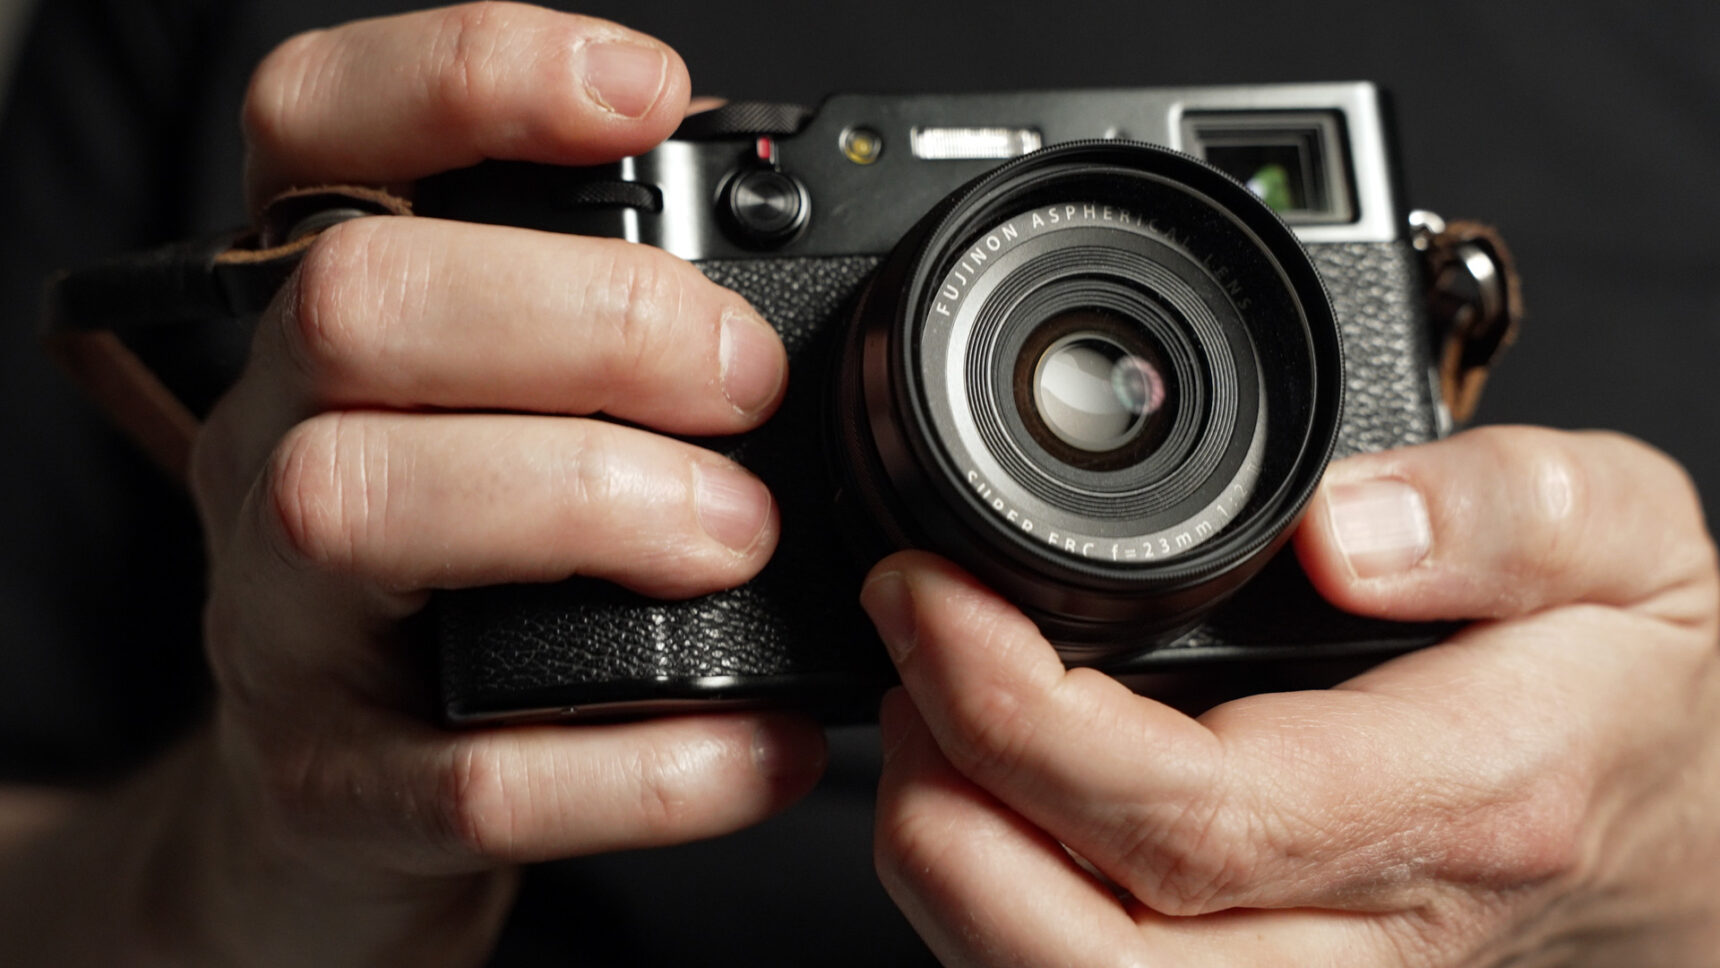
If you’re shooting at f8 on the X100V (with its 23mm lens) your hyperfocal distance is about 12.5 feet. Pre-focus your lens to that distance and everything from about 6.5 feet to infinity will be sharp. So PRETTY MUCH EVERYTHING I point my camera at is going to be in focus and I’m free to worry about the psychology of the frame.
Just the way it should be!
Now all we need to do is set our focus distance on the X100V.
Setting Manual Focus Distance On The X100V
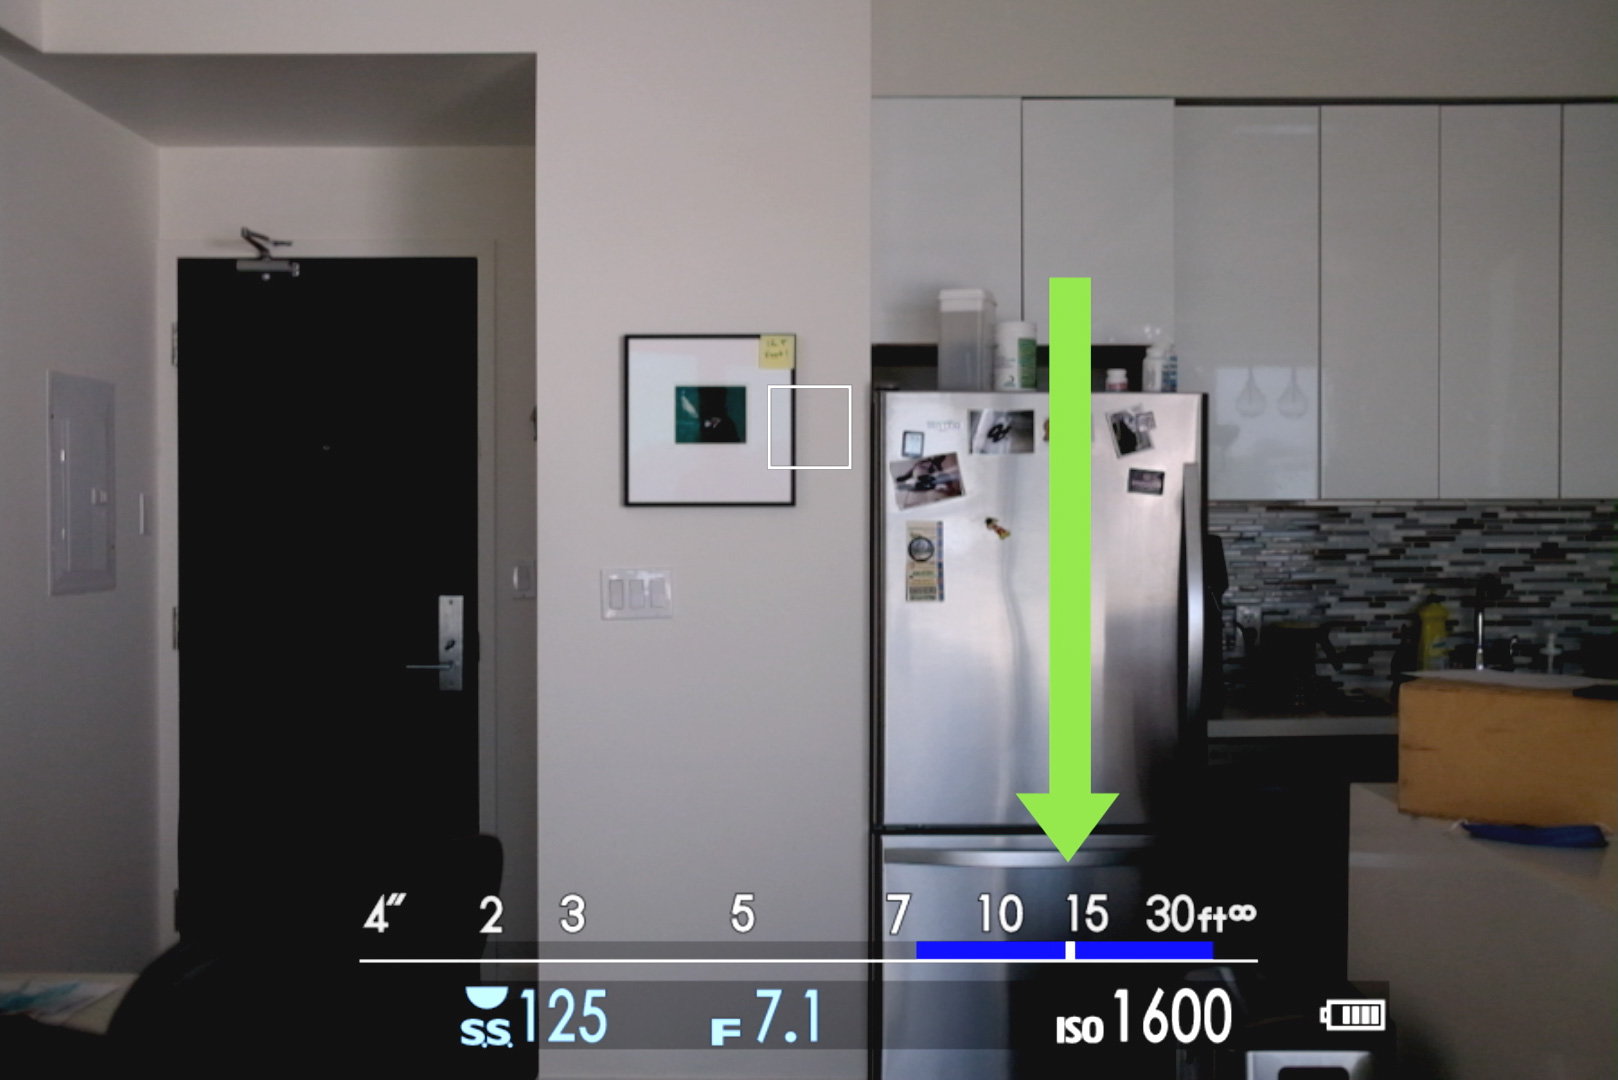
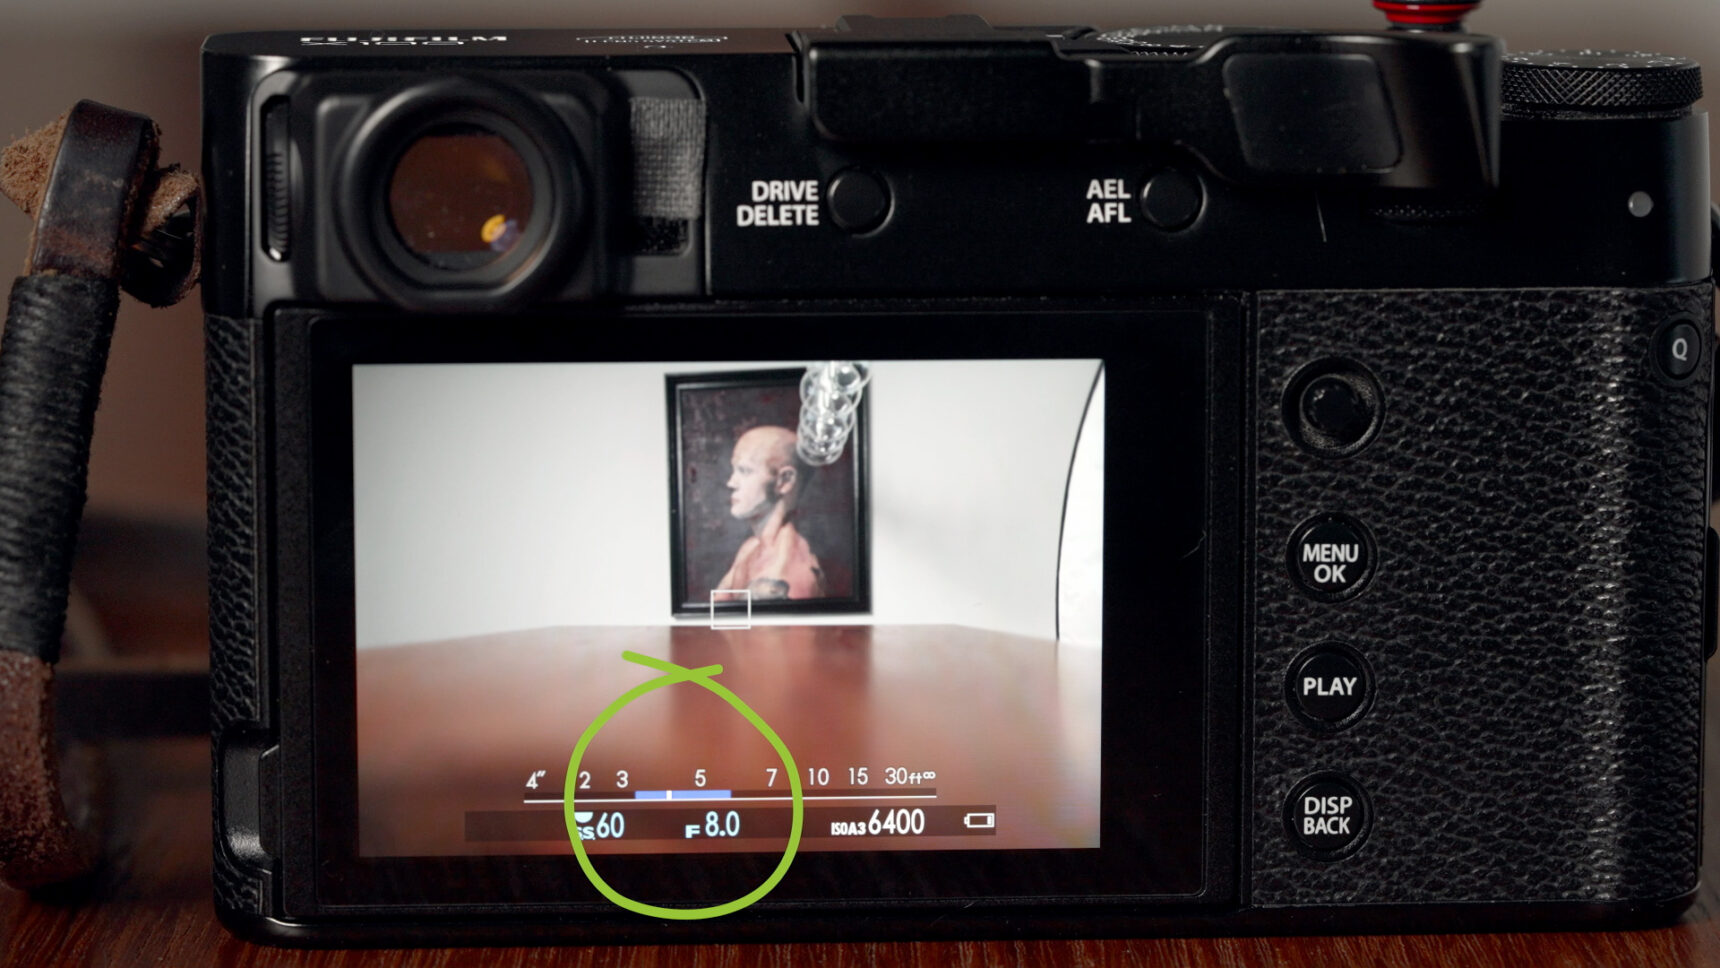
But trying to set manual focus distance on the X100V is a pain in the butt. All we have is a manual distance scale in the viewfinder but it’s kind of crap. It’s also on the LCD if that’s how you frame your shots. But it’s still crap.
As you adjust focus the indicator sort of jumps to arbitrary steps along on the scale depending on your focus distance. And of course there’s no indication of what distance any of these steps are so that’s a dead end.
So I reverse engineered the problem and set up the camera exactly 12.5 feet from the wall and used AF to lock focus on the edge of the picture frame. This put the focus indicator one “step” to the left of the 15 foot mark in the viewfinder. And it’s repeatable so I’m going to call that point on the scale 12.5 feet!
I have the control ring on my X100V set to adjust focus so I can manually set this distance any time I like. Just remember we’re not shooting wide open for bokeh here. We’ve got enough depth of field at f8 for minor variations in distance. It doesn’t matter much if your focus indicator is at 15 or 2 steps below. It’s about being in the zone. And we’re definitely there.
In the zone, that is.
We Still Need One More Zone
So I shoot at f8 with my lens set to its hyperfocal distance and everything from about 6.5 feet to infinity is in focus. And this covers me for about 95% of all the shots I take on the street. But we still need one more zone for when your subject is closer than about 6 feet.
On the X100V I set my second focus zone to be around 4 feet. At f8 that means anywhere from about 3 to 6 feet will be sharp. And that covers most close-up shots where my subject is about an arm’s length away. So that’s easy enough to remember!
We just need a repeatable way to pull focus to this point.
Using AutoFocus To Set Close Zone

In this case it’s easy to just use AutoFocus to move the focus point to the new zone. Fuji cameras let us activate AF using back button focus even when you’re in manual focus mode so this works like a charm! I set a custom button on the front of the camera to activate AF-ON because it’s a bit easier for me to get to but it does the same thing.
Now if I see an interesting subject coming my way I preemptively point the camera at the ground and grab focus. Because I wear my camera around my neck the strap keeps my distance predictable at about 4 feet every time.
Of course this distance will change depending how tall you are but it doesn’t matter if it’s 3, 3.5 or 4 feet so long as it’s the same every time so you can count on the results. It’s not a perfect science but it will get you close!
AF Range Limiter

Fuji cameras have an af range limiter which you can find at MENU>AF/MF >AF RANGE LIMITER> CUSTOM> that can be used to snap your focus to a specific distance as well. Just choose custom and set the near and far distance to the same point and anytime you activate AF it will “snap” to this distance.
I’m not the biggest fan of this technique as it takes AF at any other distance off the table until you turn the AF Range Limiter off. Even if you set this to a custom button you have to press a button to activate the fucntion, then toggle it on/off with the joystick and hit another button to confirm. But it could come in handy if you’re having trouble hitting that close zone by grabbing focus by pointing your camera at ground.
AND THAT’S IT!
You really only need two zones for most street shooting. Close up and everything else. And most of the time you’ll keep your lens set to hyperfocal so the whole thing is super easy to manage.
How I Use Zone Focus On The Street
Now that we understand the mechanics of zone focusing on the X100V we can talk about how I shoot zone focus on the street.
Like I said, this isn’t about guessing the distance to my subject. As long as they’re farther than about 6 feet (or 2 arms lengths) away I keep my lens set to hyperfocal and shoot with confidence knowing they’re going to be sharp.
You see a guy doing a back-flip in front of a bank? Snap away! Or a nun playing basketball in the park? Get the shot! Maybe you glance up just in time to see a guy wearing a banana costume walking past a pineapple stand. It’s practically a pina colada! Shoot it already!
The point is you’re good to go no matter where you point your camera.. And there’s no focus lag, nothing between you and the moment you want to capture.
If you’re shooting with AF then every time you see a potential subject you have to take a split second to pick a focus point, then another split second to acquire focus. And by that point the banana man is long gone.
I guess you could pre-plan your shot by focusing on a pineapple stand then waiting around in case a guy in a banana suit happens to walk into the frame? But that’s just boring.
And it’s not the way I want to work.
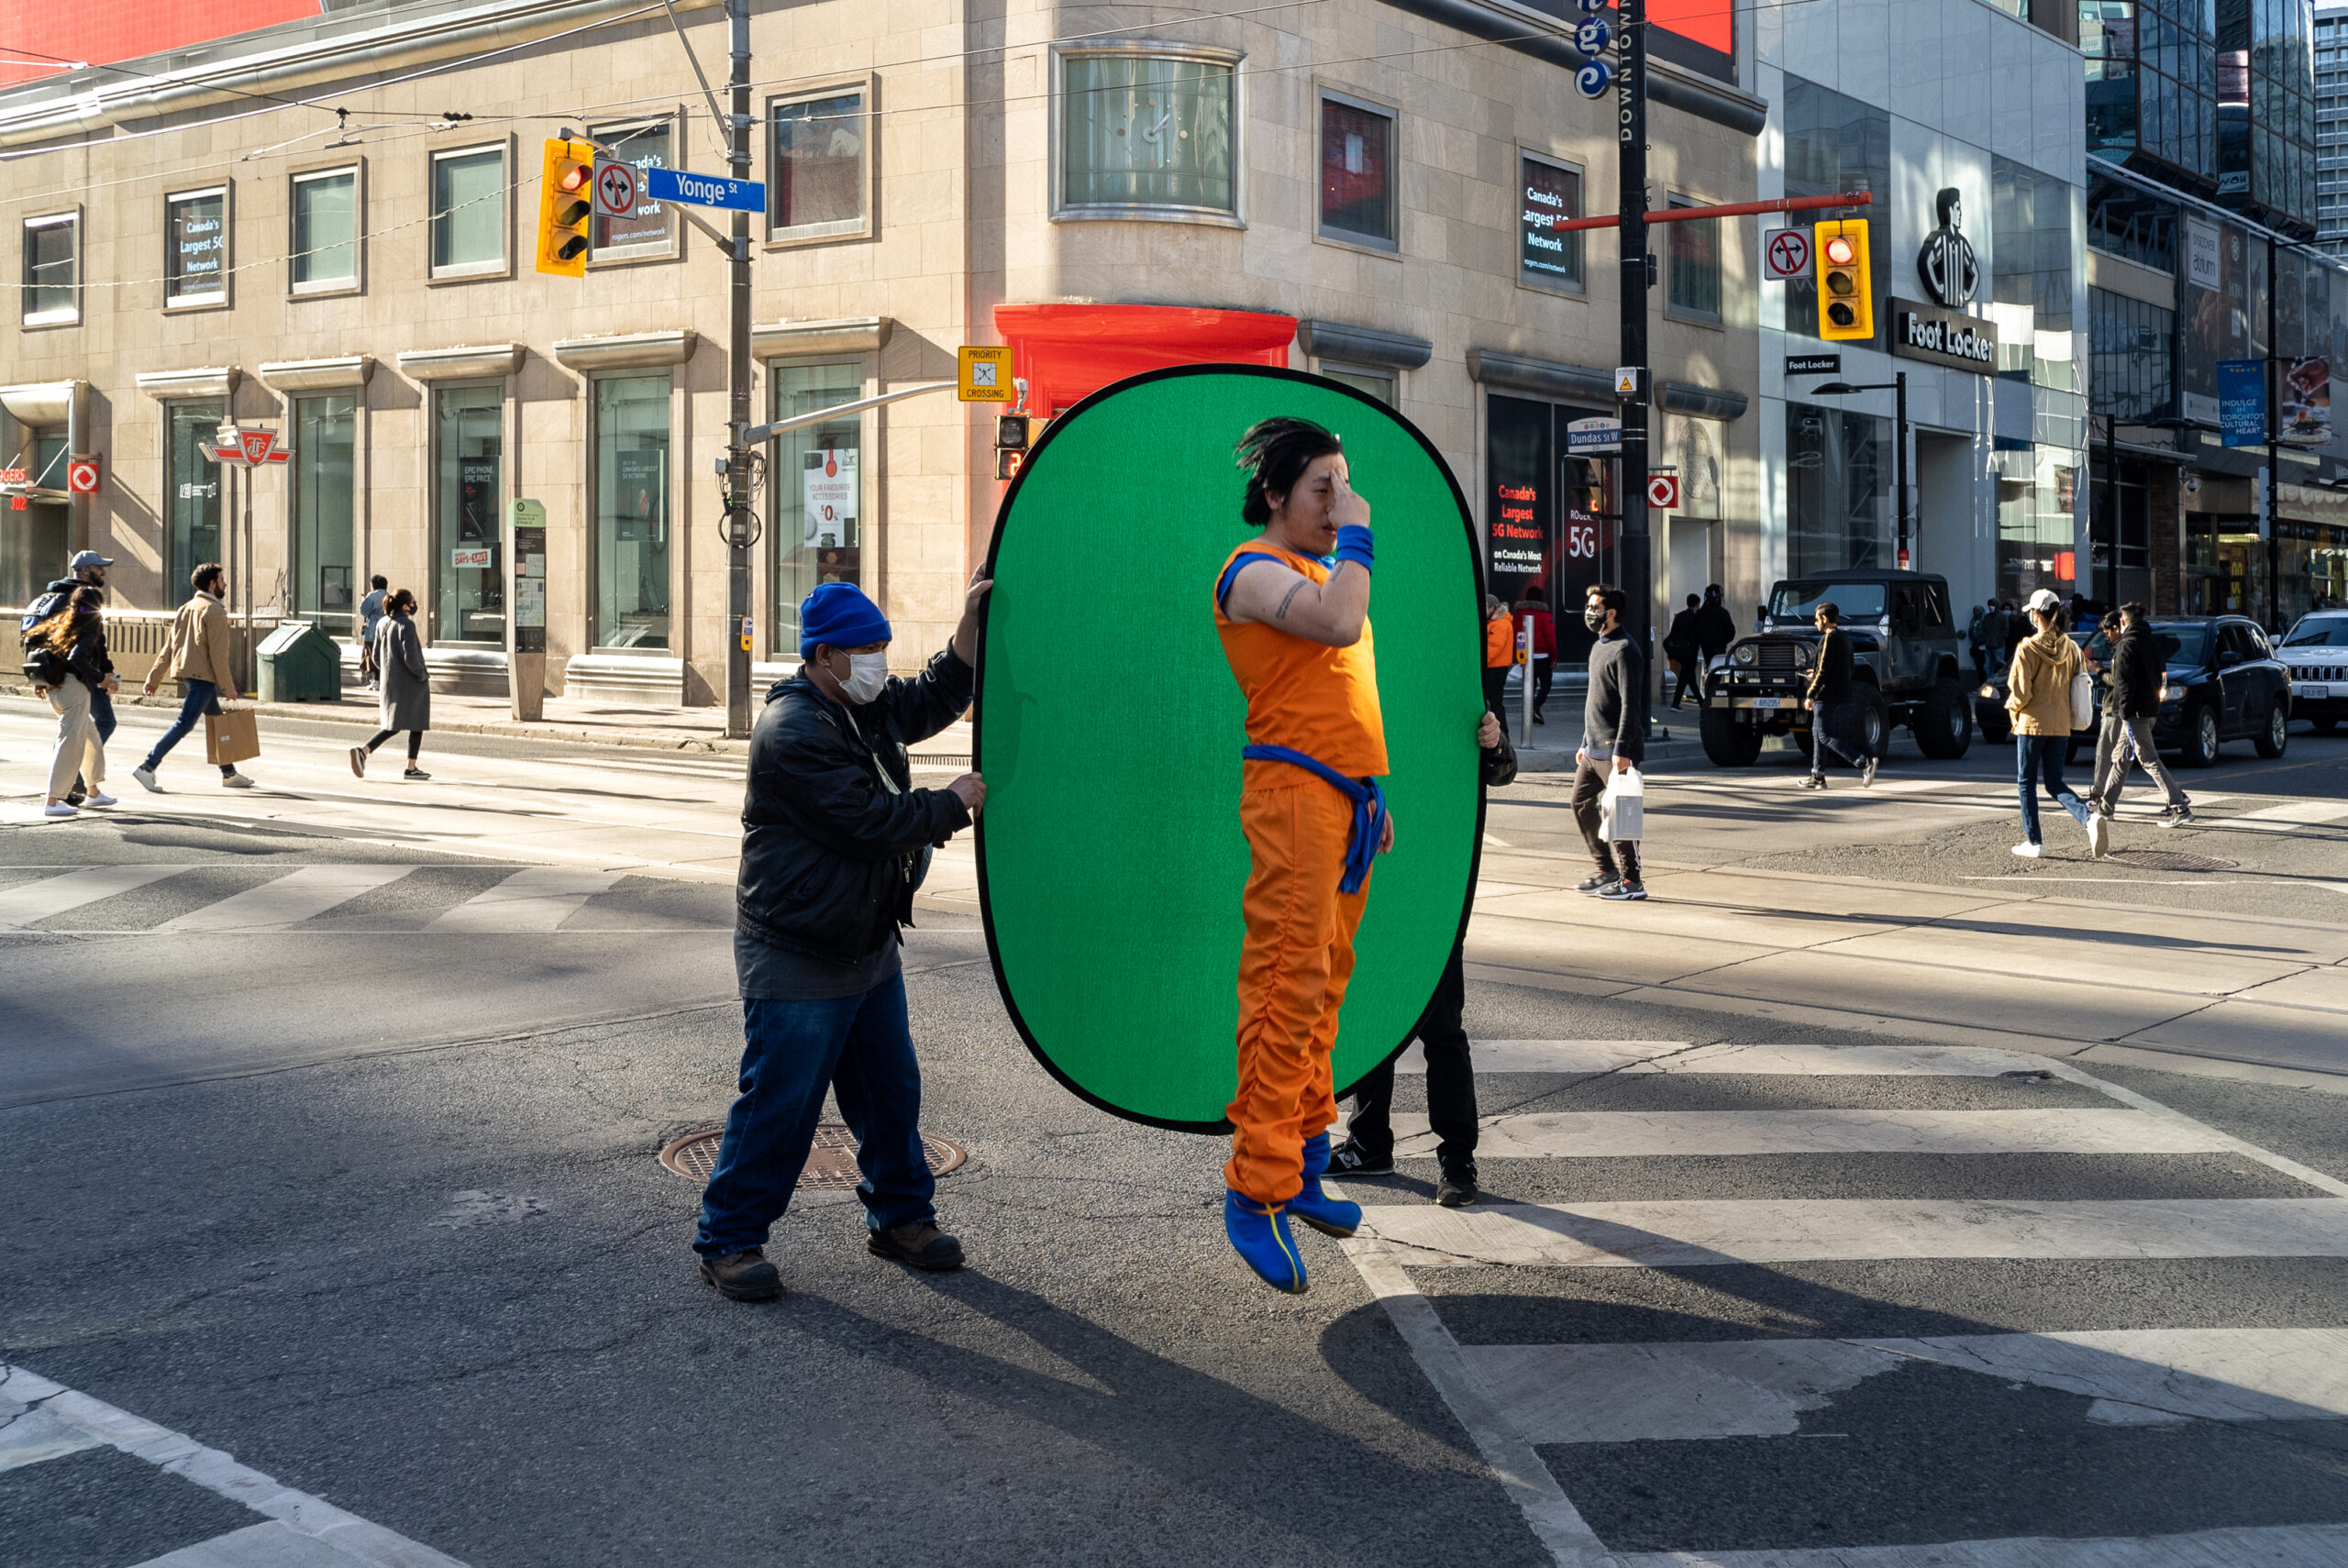
Sample Images Shot Using Zone Focus

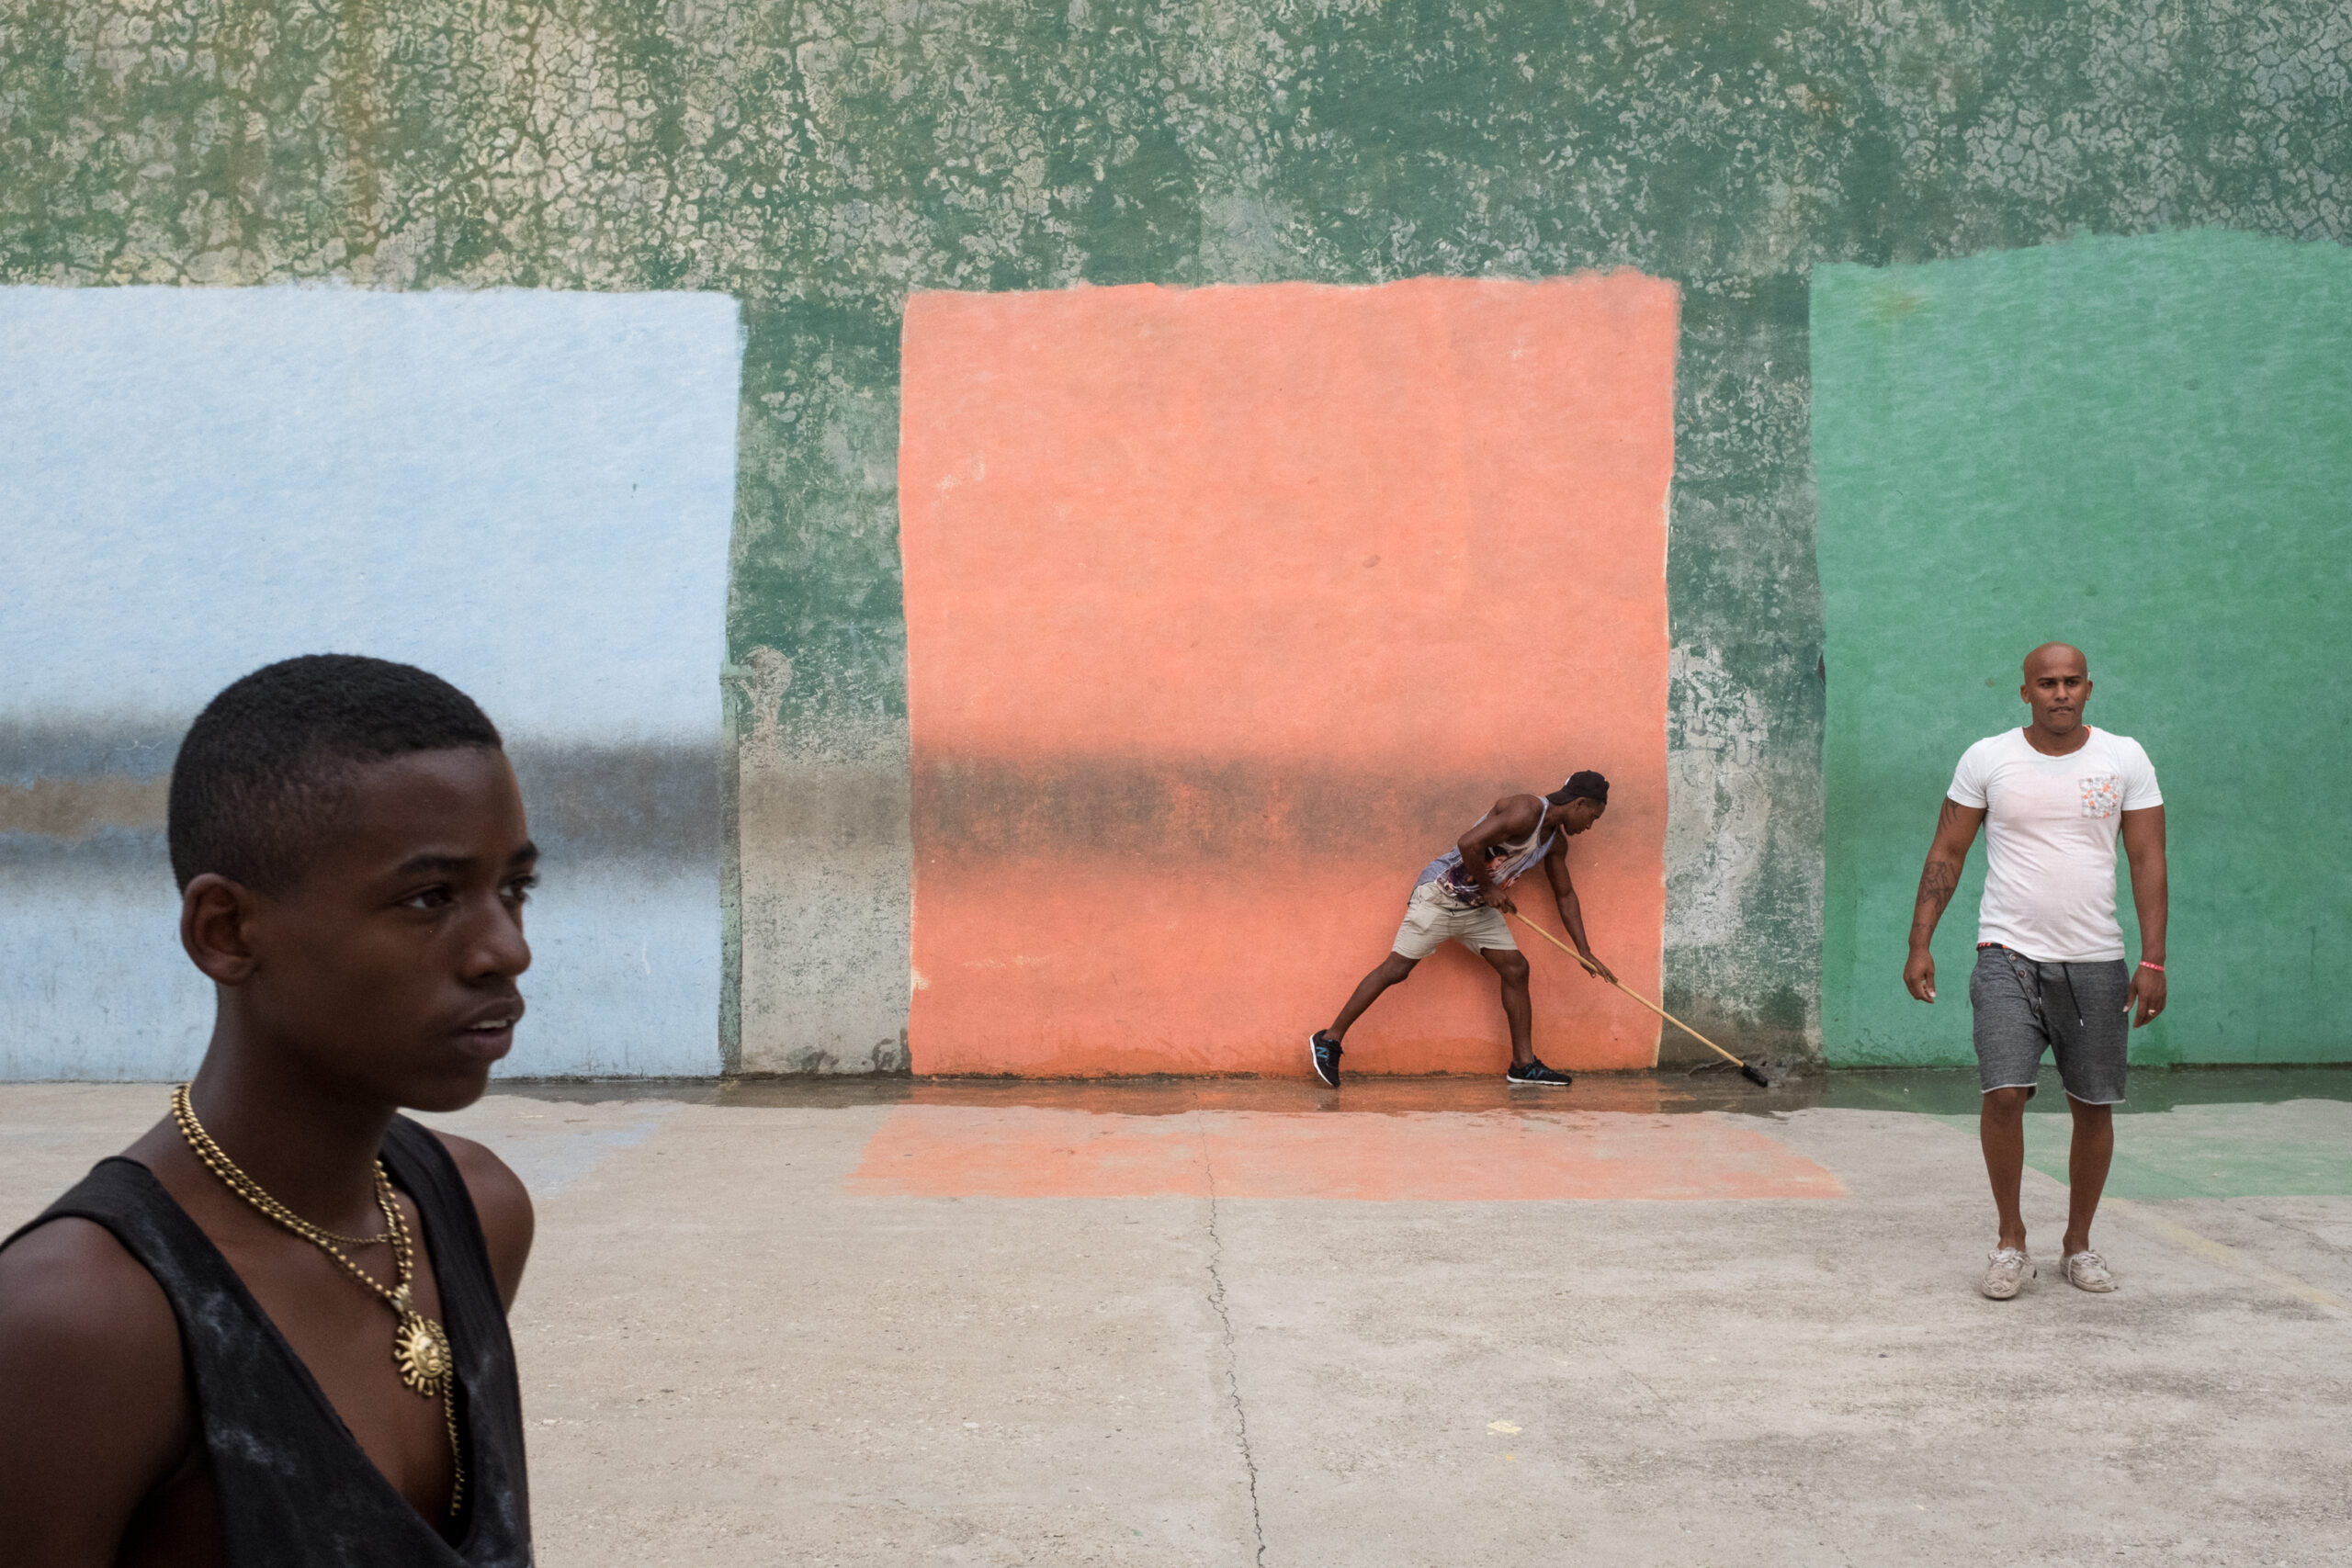
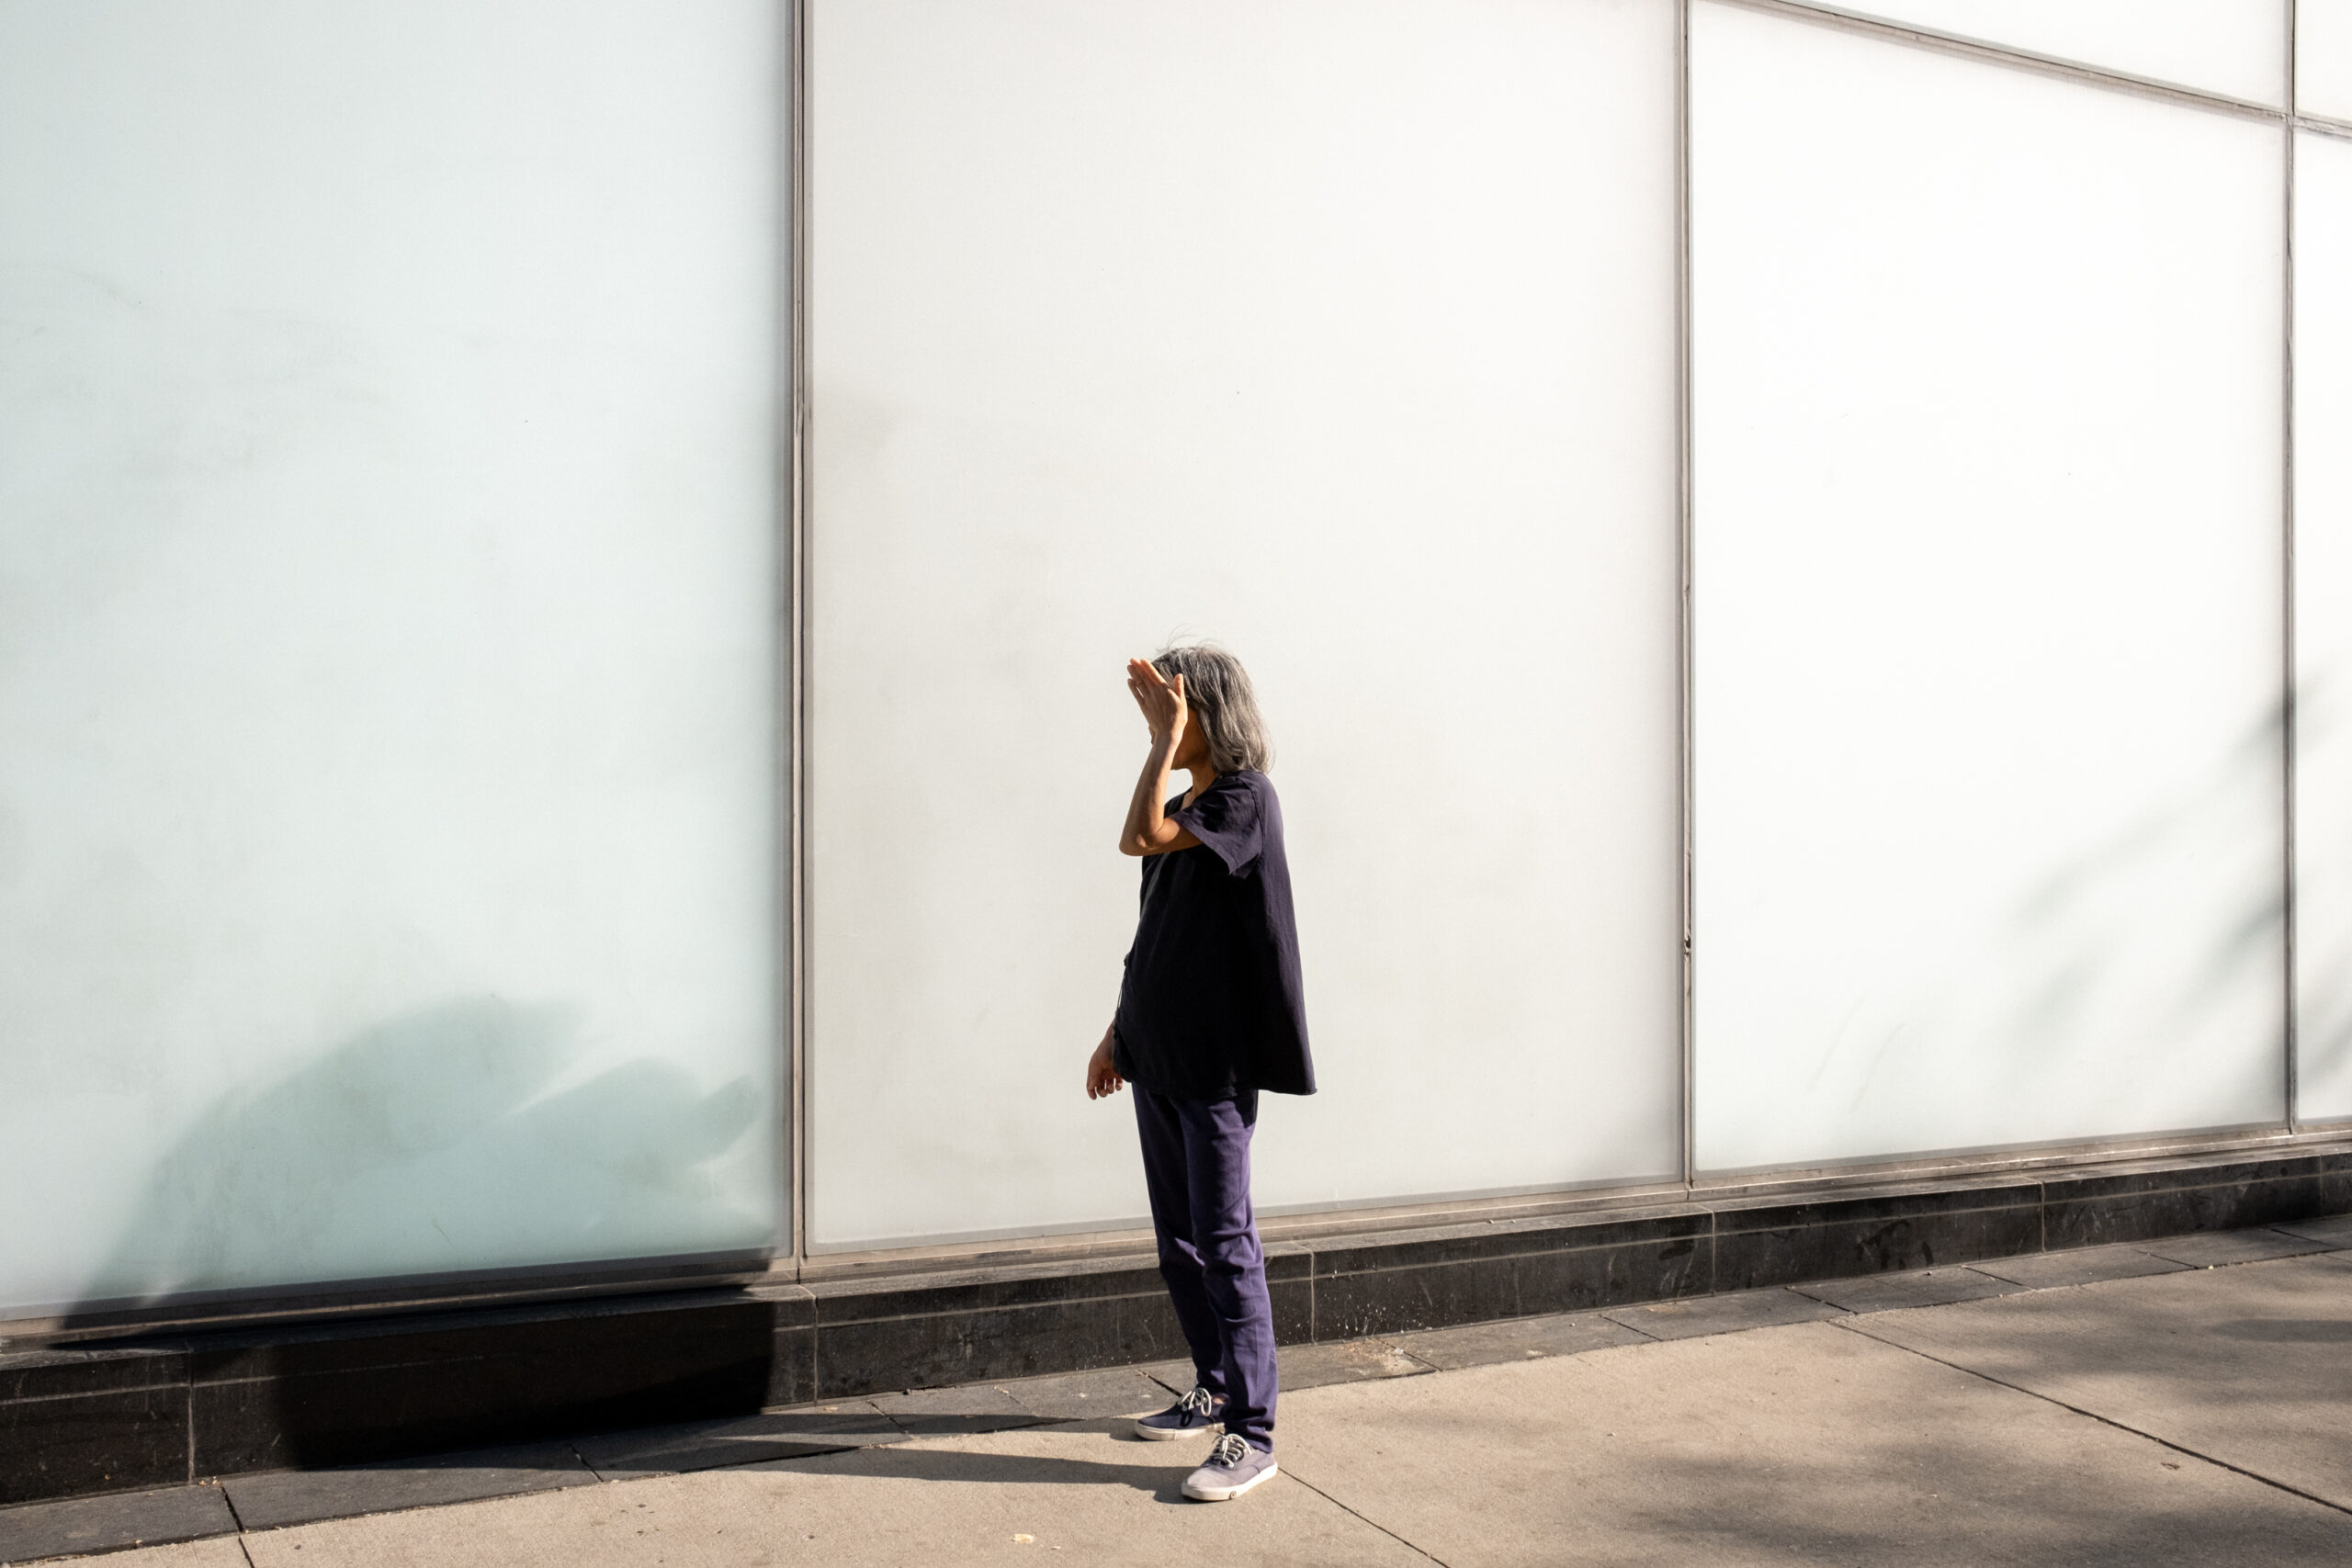
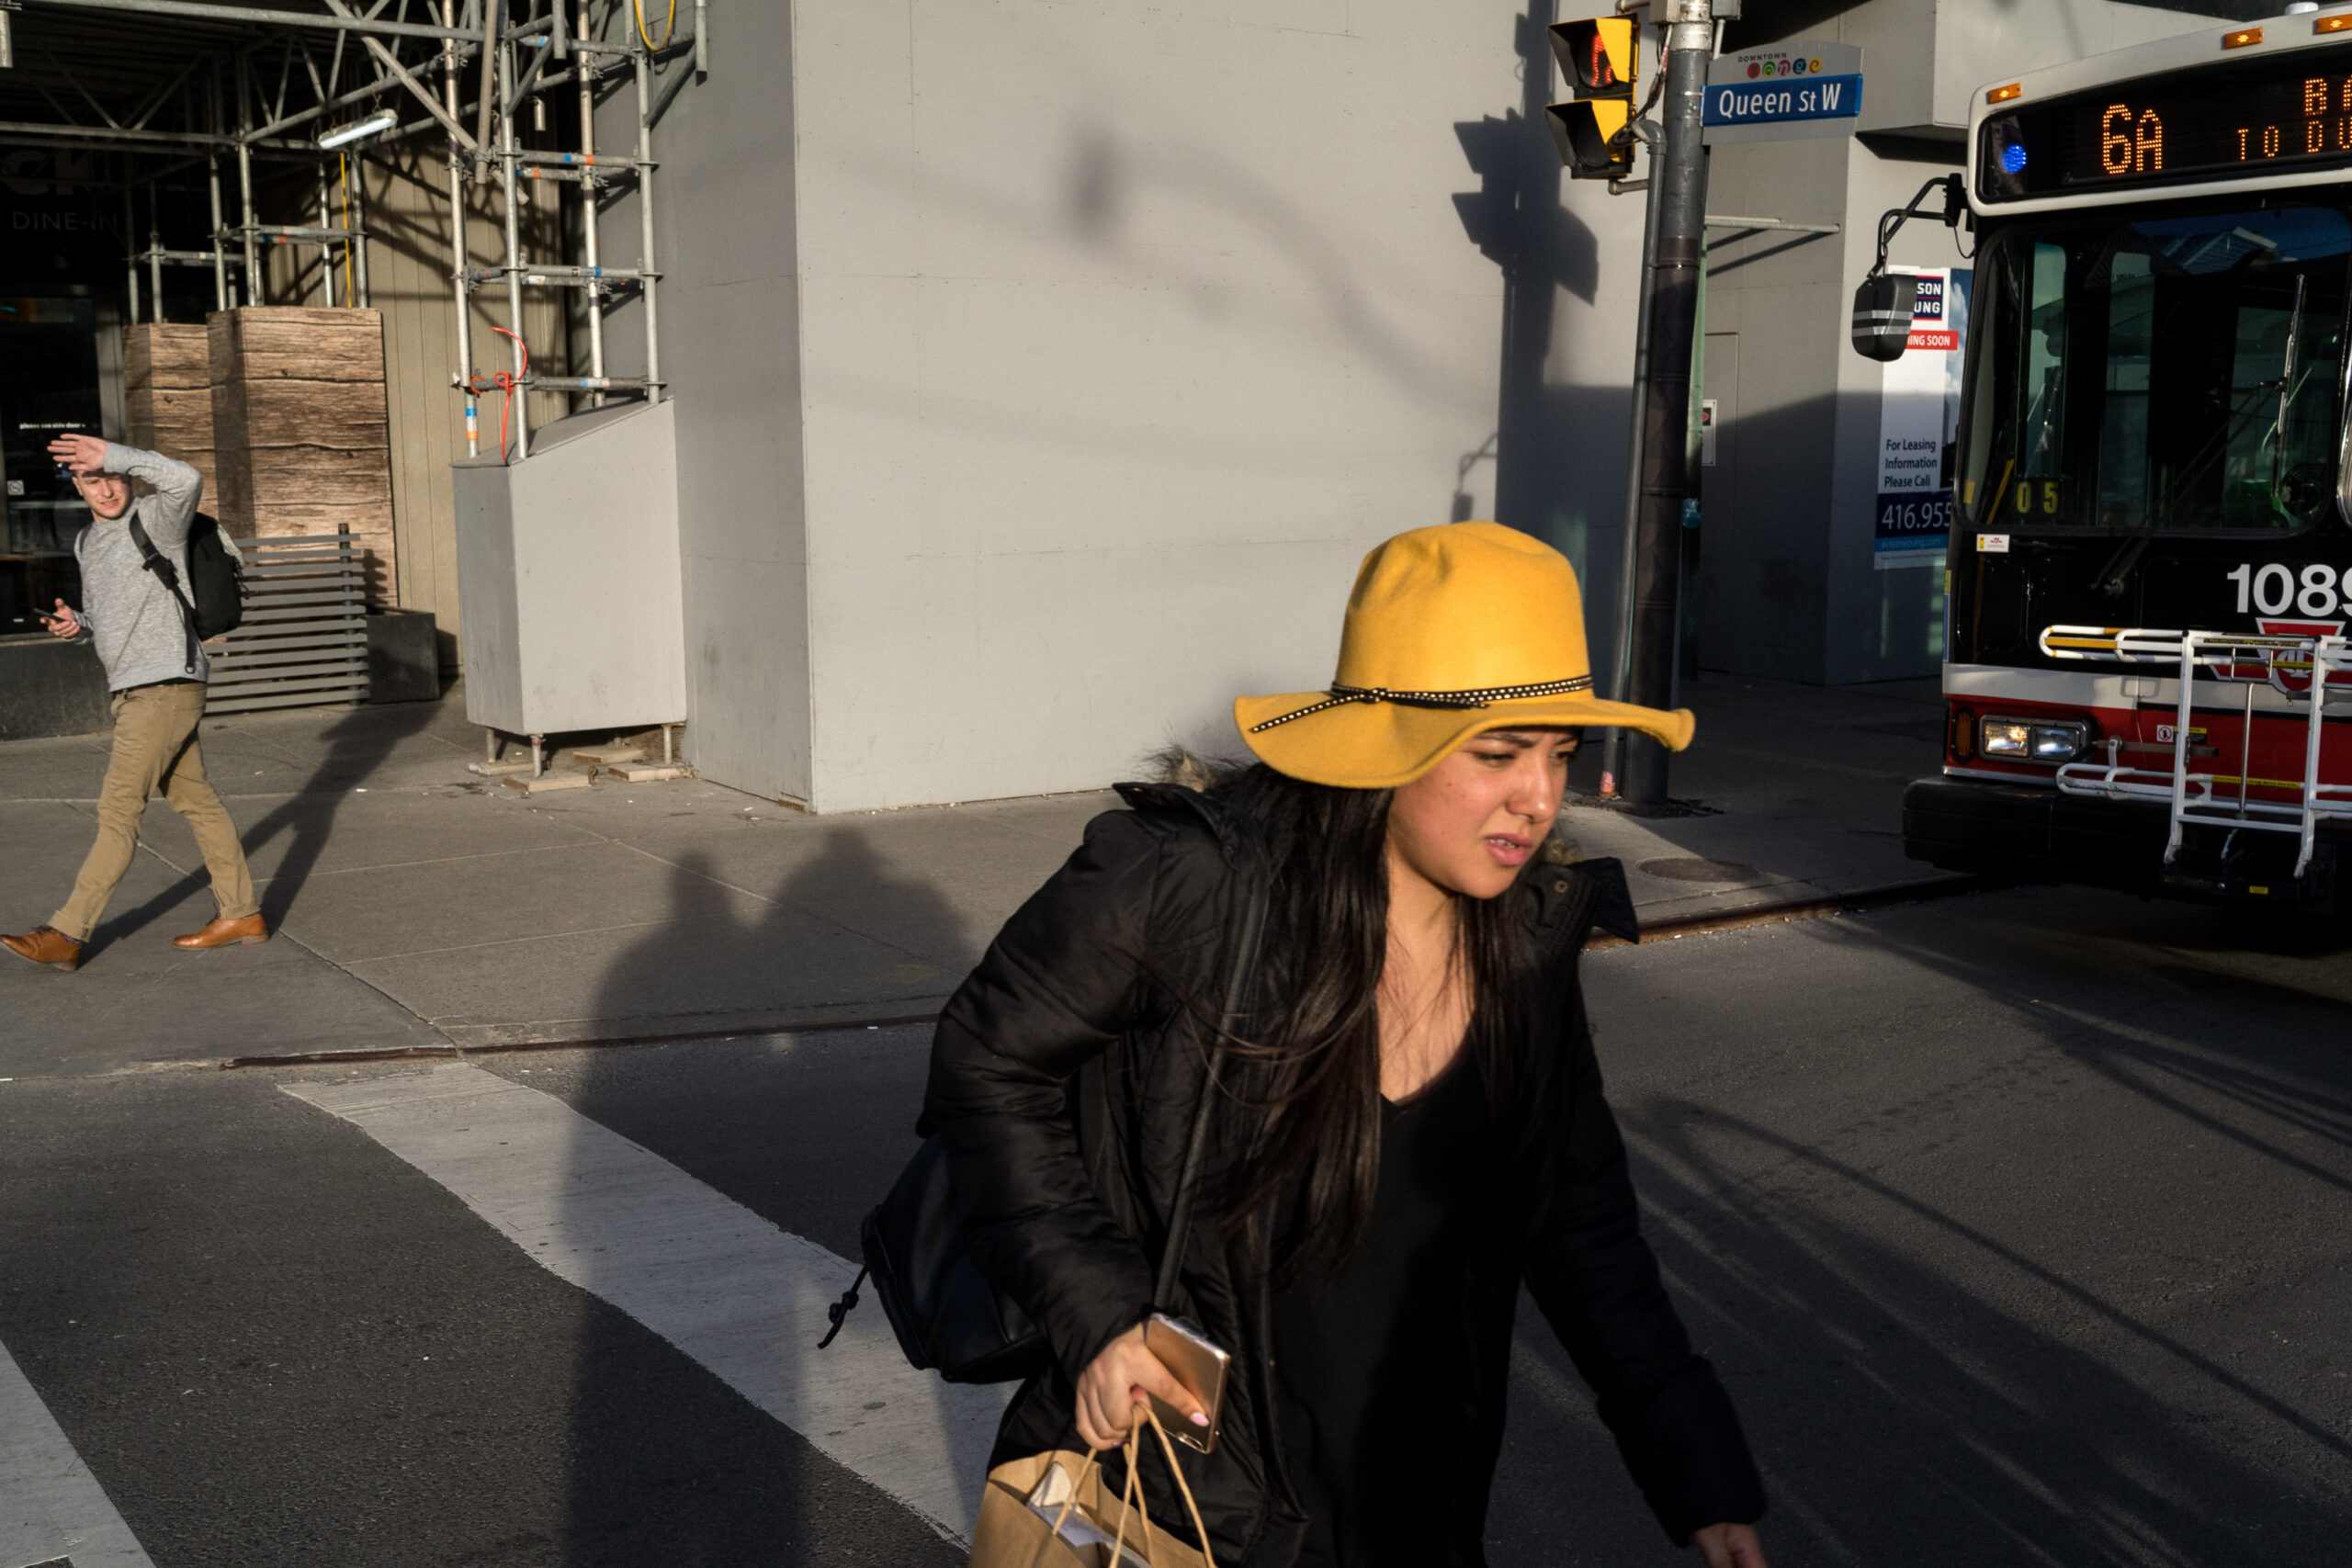


My best shots come together in an instant and I’m often moving in the opposite direction of my subject. I bring the camera to my eye long enough to make an exposure then I’m already looking for my next shot.
Whether it’s a simple trio of subjects crossing the street [BUS SHOT] or shooting at night during a Halloween festival. The world is in motion and I NEED my camera to respond instantly. Without even a moment of lag.
For me at least zone focus is the only way I can accomplish this.
Conclusion – It’s Not Perfect But It Works!
Let’s be honest, zone focus works best with a true manual focus lens like you’d find on the Leica M system. But nothing is stopping you from using zone focus techniques with your X100V. You just have to jump through a couple hoops to get there.
The reality is that for 95% of my shots I’m going to just keep the lens set at hyperfocal. And for the odd time I might want to shoot something closer than about 6.5 feet I shift the camera to “close up mode” by using AF to lock focus on the ground in front of me.
It’s not exactly an elegant solution but it works. And it means that I can walk through the world with the confidence of knowing my camera is pre focused and ready to capture any moment that happens in front of my lens.
No fiddling required!
What’s your take on zone focusing the X100V? Is this something you’re going to try or are you perfectly happy with auto focus? Post your ideas in the comments below and keep the conversation going!