Anyone who’s shot flash on the street knows how challenging it can be. There are many technical variables to consider and there’s no way to hide what you’re doing so you need to be prepared for confrontation at every turn. But the results can be astonishing! The Two Cute Dogs guide to flash street photography is a great place to start if you’re interested in street photography’s darkest art. Hit the jump for more info.
The Two Cute Dogs Guide To Flash Street Potography
Probably the most common question I receive from students is, “Can you teach me how to use a flash?” So I thought it would be worth collecting my thoughts and setting them down here. I don’t profess to be an expert on the technical side and would advise everyone to take a look at the Flash 101 Tutorial on the excellent Strobist website for far more detailed discussions on flash. But hopefully this guide will be a good introduction for those looking to use flash for street photography.
Please note that I have written this from the perspective of a Leica MP user and as a student guide, but a large part of this will apply to anyone that wants to shoot flash manually.
Why Flash Street Photography?

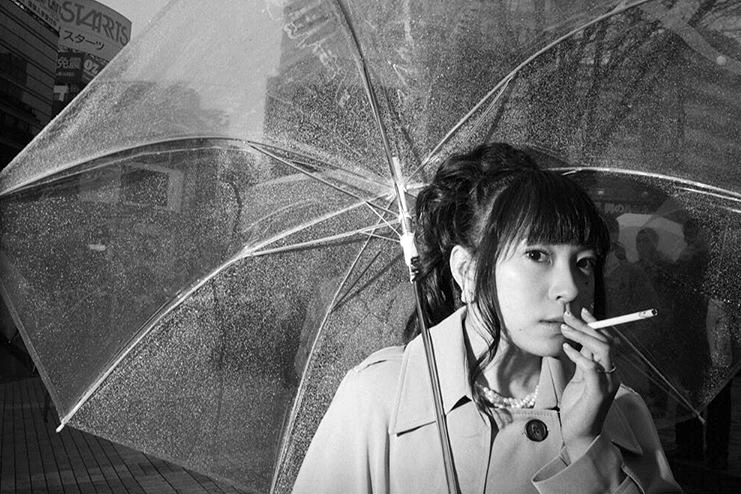
I suppose the first question has to be, “Why bother using flash at all?” When I started out in street photography I usually shot at night and I found myself missing far too many pictures by having to manually focus at f/2. Flash made things a lot simpler: it allowed me to zone focus at f/11 and, on many occasions, to not worry too much about metering. On top of this ease of use, I just liked the way the images looked. They were edgy and created a sense of tension between the subject and his or her environment. The subject would often be sharper than they’d be even at 1/1000. While flash was love at first sight for me, it is certainly not something for everyone. Even if you are against using flash, it’s not a bad idea to at least understand the principles.
Basics
Moving onto the basics, there are usually TWO exposures to think about with flash photography. The first is “ambient light exposure” or the exposure that you’d get without using the flash. Ambient light exposure is affected by ISO, shutter speed and aperture.
“Flash exposure” is the exposure that you get from the area lit by the flash. Flash exposure is affected by the inherent strength of the flash (also known as its guide number), the power that it is set on (full power, half power etc), ISO and aperture. Shutter speed has no bearing on flash exposure as the flash duration is almost always shorter than the shutter speed.

Let’s look at the components of flash exposure in more detail:
Strength Of The Flash
The power or strength of a flash is described by its guide number which describes the distance at which the flash can illuminate a subject. The higher the guide number, the greater the distance at which the flash can create an optimal exposure on your subject.
Most modern external flashes will have enough power for you to get the shots you need for street photography. The only time I’ve found power to be an issue was when I have shot on a sunny day, trying to “overpower the sun”.
Flash Power
Most flashes will have a setting where you can reduce flash power to easily control flash exposure. It’s a good idea to look for a flash that gives you quick access to this feature as you’ll likely be using it a lot on while shooting on the street. Without this feature you will need to control flash output using ISO and aperture.
ISO
In the same way as its effect on ambient light exposure, raising the ISO will brighten your flash exposure. Turning up the ISO will fire your flash further. Try changing the ISO value on your flash and checking the distance on the LCD screen. For example, using my Leica SF24D with the aperture set at f/11, the flash will fire 1.7m at ISO100, 2.4m at ISO200, 3.5m at ISO400, 4.9m at ISO800 and 7.0m at ISO1600.
Aperture
Again, in the same way as its effect on ambient light exposure, the lower the f stop, the more light is let in to the camera and the brighter the frame will be. In other words, opening up the lens will fire the flash further and closing it down will reduce its distance. For example, using my SF24D with the ISO set at 400, I get the following distances: 1.7m at f/22, 2.5m at f/16, 3.5m at f/11, 5m at f/8, 7m at f/5.6, 10m at f/4 and 14m at f/2.8.
In short, the lower the ISO or the more closed down the lens, the weaker the flash; the higher the ISO or the more wide open the lens, the stronger the flash.
Shutter Speed And X-Sync
For virtually all cameras there is a maximum shutter speed that can be used when using flash. This is called the x-sync speed (for the Leica MP this is a very slow 1/50). If you try to shoot above this speed on older cameras (including my Leica MP) you’ll get an image that is partially blacked out. Most modern cameras force you to stay at or below the x-sync speed when the flash is on.
It should be noted that many modern cameras used dedicated speedlights which have a high speed sync mode. This is manufacturer specific and you’ll need to check the manual for your camera and flash for more information. The Fuji X100 also notable because it uses a leaf shutter that can sync at pretty much any shutter speed under 1/4000 sec.
Even though shutter speed is irrelevant for flash exposure, it still affects ambient exposure. You’ll have to choose an ISO and aperture that allows you to balance your flash and ambient exposures considering your camera’s x-sync speed. Having to shoot at 1/50 on my Leica MP is an obvious a limitation that affects my ability to use flash on a bright day.
Flash Street Photography In Different Lighting Conditions
Now that we have covered the basics, I thought it would be helpful to set out my way of working in different environments, which should bring into play most of the points I have covered above.
Overcast Days

Let’s use an overcast day as an example. To begin with, I will take a meter reading of the ambient light. I can guess the light pretty accurately, but it’s easy to check exposure with your camera’s built in light meter. If I’m not using a flash, my usual settings will be around ISO400, 1/500, f/5.6 which I will need to change to ISO400, 1/50, f/16 to have the ambient light properly exposed. I then just need to plug the ISO and the aperture values into my flash, which will allow it to fire 2.5 meters. I then have to decide whether 2.5 meters is appropriate. This is sometimes OK when I’m looking for full body shots, but when I’m looking to get close, the flash is just too strong. If that’s the case then I will just reduce the power by a few stops. As the ambient light is constant on a cloudy day, all I have to ask myself is will my flash reach my subject, and is the subject in focus. I have one button to press on the flash and the focusing dial to turn on the camera.
Sunny Days

Shooting with a flash in brighter conditions is more difficult, at least with my normal ISO400 film. My shutter speed and aperture combination on a sunny day would be f/11 1/500, so it’s pretty easy to see that having to shoot at 1/50 would require an aperture of over f/22 (which I do not have). To get around this, I would have to use an ND filter, pull the film a few stops or change to a slower film. All of these methods generate another problem, however, which is that the flash wont fire that far when using a low ISO. There’s not much I can do in this case. The only solution I can think of is to zoom the flash: a narrower beam will travel further. But this creates a vignette effect and uneven lighting. This can look good, but I like to choose when to zoom the flash rather than it being forced upon me by circumstances.
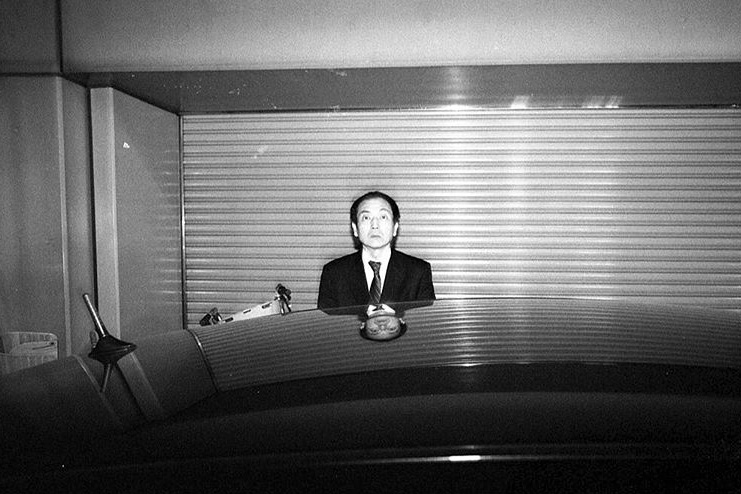
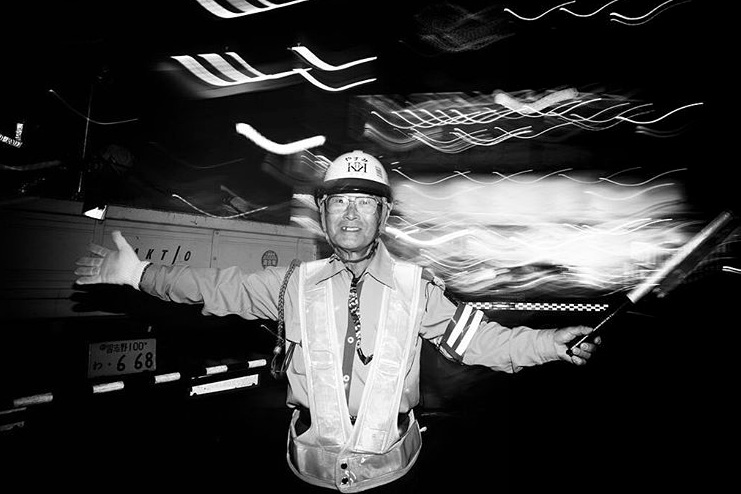
Flash Street Photography At Night

At night things become a bit easier in some ways. I seldom try to get an accurate ambient light exposure unless there is something out there worth including. Unless I’m near storefronts, the background is normally just black. So it makes very little difference if the aperture changes a few stops. This is key as it means that I can control the “reach” of the flash by simply turning the aperture dial. I know, for example, that at full power and at ISO 400, my flash will fire at 1.7m (f/22), 2.5m (f/16), 3.5m (f/11) and 5m (f/8). So – say my aperture is set at f16 and I see something at 5m away and need to get the shot quickly, I’ll just change the aperture to f/8, focus and take the shot.
Why Manual?
I am not evangelical about shooting in manual mode – it’s just that manual has been what has worked best for me in the past. “A” mode has not always been predictable (although I do use it when I want to bounce the flash off the ceiling) and TTL doesn’t work with my camera. Manual certainly has its limitations as there can be some fiddling involved, but I’d rather miss a shot because of my slowness than it being the fault of the camera. In any event, I’d advise everyone to play around with all of their flash modes. If your automatic settings work well for you then I’d say you’re good to go.
Judging Distance
If you do decide to shoot in manual mode it is often difficult to guess the distance of your subject to the flash. If you have time then the best approach is to use the rangefinder to focus, read the distance from the lens and then plug that distance into the flash. If you don’t have time then it’s important to try to learn distances. Practice by guessing the distance of various objects to your camera and then checking with the rangefinder and distance scale. After a while it becomes relatively easy to get quite accurate.

Another tip is to realise that there are generally 3 types of pictures in street photography – head only, waist up, and full body. On the basis that you use the same focal length, the next step is to work out how far away your subject needs to be for each of these shots. For example, using a 28mm lens, I know that my subjects need to be at 70cm for a tight head shot, around 1.5m for a waist-up and around 2.5m for a full body shot. Once you know this, when you see someone coming towards you, you just need to decide what type of picture you want, have the focus and flash set at the right distances and shoot once the subject fills the frame in the correct way. It’s not too difficult with practice.
Shooting Close And The Inverse Square Law
One word of warning I’d like to give here is to be very careful when shooting up close. Due to the inverse square law, light falls off more quickly the closer the flash is to the subject. Therefore it is quite easy to under expose your subjects. What I do when shooting head shots is add a touch more power (eg 0.9m rather than 0.7m) and if the subject is over exposed I bring them back a little in post production. Shooting film also helps here as it’s generally better to over expose film and highlights can be saved quite easily if your film has enough latitude. For digital flash shooters – shoot raw.
The other point to note about the inverse square law is that it is very hard to light multiple subjects at different distances from the camera with one flash, especially where the nearest subject is close to the camera. The only way around this is to bounce the flash off the ceiling, use more than one flash or shoot when the nearest subject is a bit further away.
On Or Off Camera?

It’s really up to you to decide on this. There are pros and cons to both methods. These days I prefer to shoot with the flash on camera. I don’t like to have a camera in one hand and a flash in the other. It feels a little cumbersome. In addition, it’s very easy to scare your subjects when you are shooting – a photographer that raises both arms as he takes a picture can be quite intimidating, which results in more confrontations and less “natural” photos. Also in many cases it’s pointless. If you are holding the flash and it’s close to the camera, why not simply put it on the hotshoe? There are of course advantages of shooting off camera. What I like about off camera flash is that it can create a more dramatic look. Light usually comes from above the subject – the sun, street lights etc – so being able to bring the light source to head height or even below can create something quite interesting. Although these days the only time I really take the flash off camera is when I’m shooting a consensual portrait, I would certainly encourage everyone to experiment with off camera flash. The results can be amazing.
Wireless triggers/cords
I use Flash Wave triggers. They are pretty small and have been incredibly reliable for me over the years. The only time they have failed to fire is when I have forgotten to turn them on. I prefer these to using cords, as cords always seem to stretch over the viewfinder and get in the way. The downside to using wireless triggers – for Leica users anyway – is that they sit on top of the hotshoe – so shooting with a lens wider than 28mm becomes a matter of guess work as you can’t use an external viewfinder. But if you generally shoot at 28 or narrower and want to experiment off camera, I’d advise buying a set of wireless triggers.
Concluding comments
As with most things in life, the way to become proficient at using flash is to practice it. Before hitting the streets I generally advise students to use their friends and family as guinea pigs – or even to buy a second hand mannequin. Practice at half power to save batteries and if you have a digital camera it’s best to use that as you can see your results instantly. If you don’t have a digital camera then make a note of the settings you are using for each shot – for ambient and flash exposures. Once you become comfortable on the technical side, then go out on the streets. This is where it gets interesting…
Once you become proficient with the flash, then it’s important to not get carried away. As there is a far greater risk of confrontation when using a flash, its important, I think, to shoot sensibly. Spraying and praying with a flash is a fool’s game! Also remember that just because a flash was used it doesn’t make the picture automatically any better.
Finally, as with all photography, make sure to study photographers that use flash well. There are many. Martin Parr, Bruce Gilden, Thobias Fäldt, Jacob Aue Sobol come immediately to mind, but Simon Kossoff, Charalampos Kydonakis, are some contemporary photographers whose work is also worth looking at.
There are some pictures on my instagram too.
Two Cute Dogs is working on a book of images from his time in Turkey that should be available next year. Signup to be notified when pre-orders are available at:
The Two Cute Dogs guide to flash street photography originally appeared on twocutedogs.com and disappeared when the website was deleted earlier this year. It’s being republished here with permission of the original author.
StreetShootr’s Take
Flash is like nicotine for street photographers. Once you start, chances are you’re going to be hooked! But the rewards are definitely worth the bit of practice it takes to master flash on the street.
Sure, you can throw a TTL flash on your camera and hope for the best but if you really want to control what’s happening in a predictable way then you need to shoot with your flash in manual mode. Two Cute Dog’s tutorial is a great starting point even if it’s based on using a film camera (which can be a bit more forgiving when overexposed).
Remember that pixels are free for digital shooters so you can make all kinds of mistakes and learn from every one of them. When you’re learning flash it even pays to chimp your exposures and learn from your mistakes in real time! Practice hard and pay attention to the basics and you’ll be controlling the beast in no time at all!
But Two Cute Dogs reminds us that flash street photography will likely cause more confrontation so choose your frames with care. Don’t run around “Gildening” everyone on the sidewalk and be friendly with the people you do photograph. Photographing with a flash isn’t an assualt but some people will still be shocked by the pop. Empathy with your subjects will go a long way.
What’s your take on Two Cute Dogs guide to flash street photography? A great intro to controlling flash on the street? Or something to be avoided at all costs? Post your ideas in the comments below and keep the conversation going!